Your patio deserves more than just open sky. Whether you’re tired of harsh afternoon sun, unexpected rain showers, or simply want to define your outdoor living space, the right patio ceiling transforms both comfort and functionality. From classic pergolas to retractable awnings and living green canopies, there are plenty of outdoor patio ceiling ideas that work for different budgets, aesthetics, and maintenance tolerances. This guide walks you through nine practical options, some you can tackle yourself over a weekend, others worth calling in professionals for. Let’s explore what works best for your backyard.
Table of Contents
ToggleKey Takeaways
- Outdoor patio ceiling ideas range from affordable DIY shade cloth ($70–$200) to engineered solid roof structures ($8,000–$25,000), so you can find a solution for any budget.
- Pergolas offer the most versatile balance of aesthetics and partial shade, costing $1,500–$4,000 and working as both standalone structures and frames for climbing vines or retractable fabric.
- Retractable awnings provide on-demand flexibility with mid-range motorized models ($2,000–$4,000) including wind sensors, though professional installation is recommended for proper mounting and wiring.
- Living green ceilings using climbing vines like clematis or wisteria deliver natural cooling and curb appeal but require 18–36 months to mature and steady annual maintenance.
- Solid roof structures require permits and professional installation but provide year-round protection and can boost home resale value, making them ideal for long-term homeowners.
- Budget-friendly DIY options like shade cloth, simple pergolas, or reclaimed pallet panels let you test solutions before committing to permanent outdoor patio ceiling installations.
Pergola Covers: The Classic Shade Solution
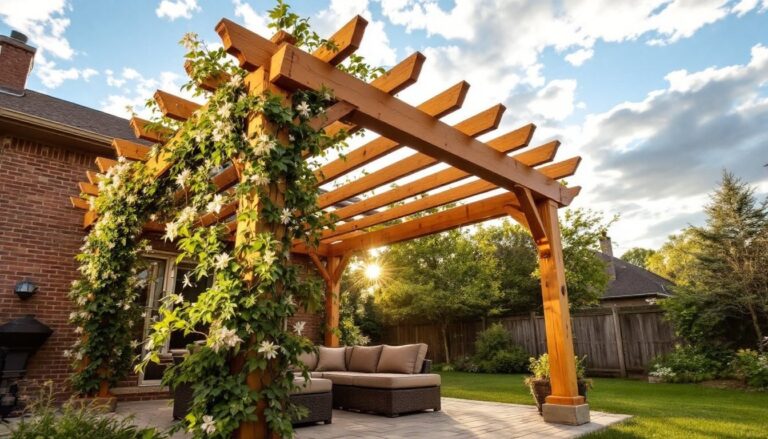
A pergola remains the most versatile outdoor patio ceiling option, blending aesthetics with partial shade. Traditional open-beam pergolas filter sunlight rather than block it entirely, ideal if you want dappled shade without total darkness. They’re built from pressure-treated lumber (typically 2×6 or 2×8 beams) spaced 12 to 18 inches apart, so you control how much light penetrates.
If you’re building from scratch, a 12×12-foot pergola runs roughly $1,500 to $4,000 depending on wood quality and local labor. Cedar or composite materials cost more upfront but resist rot better than standard treated lumber. Kits simplify installation, you’re essentially assembling a large frame using bolts and lag screws into a concrete foundation or attached to the house ledger board.
For deeper shade, add retractable fabric or shade cloth panels that roll up when you don’t need them. This hybrid approach gives you flexibility without permanent coverage. Pergolas can also support climbing vines like clematis or grape vines, which create natural cooling as foliage matures, though this takes one to two seasons to fill in.
The main DIY consideration: proper footing. Shallow footings shift with frost cycles, causing posts to lean. Dig below your local frost line (often 12 to 48 inches depending on climate) and use concrete footers or adjustable post bases. If you’re unsure about frost depth or soil load calculations, consult local building codes or a contractor.
Retractable Awnings: Flexibility Meets Style
When you want shade on demand without permanent structure, retractable awnings deliver. Motor-driven or manual crank models extend and retract as needed, letting you enjoy sun in morning and shade by afternoon. They’re mounted to the house or pergola frame using heavy-duty brackets and typically span 8 to 20 feet.
Quality matters here. Budget models ($500–$1,500) work fine for light use but may struggle with wind or frequent operation. Mid-range motorized awnings ($2,000–$4,000) include wind sensors that auto-retract in gusts above a threshold, protecting fabric from tearing. Many run on standard 120-volt circuits, though some require dedicated wiring, plan for $300 to $600 if your electrician must run new conduit and outlets.
Fabric choices impact longevity. Acrylic (solution-dyed) resists fading better than polyester and lasts 10-15 years with care. Vinyl-coated options are tougher but heavier and less breathable. All outdoor awning fabric benefits from annual cleaning with mild soap and a soft brush to prevent mold.
Installation usually requires two people and a level, though mounting into stucco or masonry demands concrete anchors. If attaching to wood siding, use lag bolts into the house rim board, not just the fascia. Motorized units may need an electrician for safe wiring. This isn’t a true DIY for most homeowners, but it’s a one-day professional install.
Solid Roof Structures: Permanent Protection
For year-round protection and dramatic curb appeal, a solid roof patio, also called a patio room or weatherproof structure, is unbeatable. These feature angled roofing (metal, asphalt shingles, or composite) over engineered framing, providing complete shelter from sun and rain. They transform a backyard into a true outdoor room and often boost home resale value.
Costs are substantial: $8,000 to $25,000+ depending on size, materials, and whether you add electrical, plumbing, or HVAC. A 12×16-foot structure with standing-seam metal roofing and engineered posts typically lands around $15,000. Roofing material choices include metal (lightweight, long-lasting, 40-70 year lifespan), asphalt shingles (familiar, lower cost, 15-20 year lifespan), and composite slate (aesthetic appeal, moderate cost).
Permits are required. Most jurisdictions demand structural engineering for load-bearing calculations, electrical inspections if adding outlets or fans, and sometimes a separate roof permit. Building departments verify the structure meets local wind load, snow load, and attachment requirements to the house.
Foundation and framing matter enormously. Posts must rest on concrete footings below the frost line (as with pergolas), and the ledger board attaching to your house must bolt through the rim board with proper flashing to prevent water intrusion. This isn’t a DIY project, hire a licensed contractor and ensure they pull permits. A poorly built roof structure can cause foundation issues and void warranties on attached roofing.
Fabric Canopies: Lightweight & Affordable Options
Pop-up canopies and tension fabric canopies offer quick shade at low cost. Pop-ups (8×8 or 10×10 feet) assemble in minutes, cost $100 to $400, and pack away when not in use, perfect for renters or temporary setups. Downsides: lightweight, blown over in wind gusts above 20 mph, and UV-blocking fabric degrades in 2-3 years of full sun exposure.
Tension fabric canopies are more permanent. Posts anchor into ground sleeves or weighted bases, and tensioned fabric stretches overhead. They provide dappled shade and look sleek in modern yards. A 12×16-foot tension structure runs $3,000 to $6,000 installed. Setup requires precision, fabric must be evenly tensioned or it sags or tears. Professional installation is strongly recommended.
For both types, fabric coatings are crucial. Solution-dyed acrylic (UV-resistant, breathable, lasts longer) beats cheaper polyester. Check coverage: most block 75–95% of UV rays. If mold or mildew concerns you, Sunbrella and similar marine-grade fabrics resist growth better.
A budget middle ground: pole-mounted sailcloth canopy ($800–$2,000). Lightweight triangular or rectangular fabric stretches between posts and can be manually adjusted by tilting poles. It’s not as durable as engineered solutions but beats pop-ups in wind and looks more intentional than temporary shade.
Living Green Ceilings: Natural Shade With Plants
Living ceilings, climbing vines or overhead trellises with cascading greenery, provide natural cooling, curb appeal, and habitat for pollinators. Pergolas work best as the frame, with vigorous vines like clematis, wisteria, or hops trained overhead. As foliage thickens, shade deepens and temperatures underneath can drop 5–10 degrees compared to open sun.
Setup requires sturdy horizontal structure (a weak pergola won’t support mature vines). Vines need planting space, either in-ground beds or large raised containers if your patio is hardscaped. Wisteria and grape vines are aggressive growers, prune them annually or they’ll consume gutters and siding. Less demanding options include passion flower, jasmine, or ornamental hops.
The learning curve is modest. Plant vines in spring or early fall, water deeply for the first season, and install horizontal wires or netting for the vines to climb. Many gardeners find this approach more rewarding than static shade, flowers and wildlife activity add life to your patio.
Costs are minimal if you already have a pergola: vines run $20–$50 per plant, and you’ll likely need 4–6 for decent coverage. The tradeoff: this solution takes time. Expect 18–36 months for a mature, full canopy depending on vine type and climate. Deciduous vines shed leaves in winter, providing light then but zero winter shade.
Budget-Friendly DIY Alternatives
Not every patio ceiling demands contractor involvement or a big budget. Several DIY-friendly options work for modest patios or as stepping stones to more permanent fixes.
Shade cloth hung from cables or ropes between posts is a proven low-cost solution. Medium-grade shade cloth (30–50% density) costs $0.50–$1.50 per square foot. A 12×12-foot area uses roughly 144 square feet, so material runs $70–$200. Attach it using stainless steel lag bolts, cable ties, or turnbuckles tensioned to wooden posts you’ve already installed. Shade cloth lasts 3–5 years in direct sun before UV breaks down the polypropylene fibers.
For a more permanent DIY pergola, a beginner can build a simple 8×10-foot version using pressure-treated 2×6 beams in a weekend or two. You’ll need a reciprocating saw or circular saw for angled cuts, a drill for lag bolts, and a post-level to ensure square posts. Concrete mix ($8–$12 per bag) anchors the four posts, plan for eight 80-pound bags to set posts 3 feet deep. Total material cost: $600–$1,000. Just ensure your frame sits on proper footers. Flimsy pergolas shift and warp within a year.
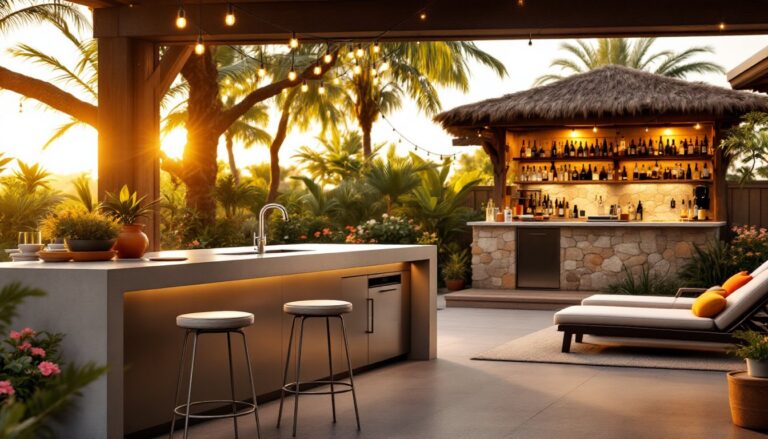
A hidden gem: pallet shade panels. Weathered wooden pallets can be stacked, wired together, and mounted as a lattice ceiling. Free or near-free pallets (often behind stores) weathered naturally and look rustic. Secure them to overhead beams with lag bolts and carabiners. They filter dappled shade and add character without custom building. The catch: pallets vary in strength: inspect carefully and plan for eventual rot if exposed to constant rain. Outdoor Kitchens: Transform Your Backyard into a Culinary Paradise pairs well with any of these shade solutions, making your patio a true entertaining hub.
Conclusion
Outdoor patio ceiling ideas range from simple shade cloth to engineered structures, each suited to different budgets and timelines. Pergolas balance aesthetics and partial shade at moderate cost. Retractable awnings offer flexibility. Solid roofs deliver year-round protection and resale appeal. Fabric canopies keep it affordable, and living green ceilings add natural beauty. Whether you’re a hands-on DIY builder or prefer professional installation, there’s a solution that fits. Start with your climate, maintenance tolerance, and how long you plan to stay in the home. Then pick the option that delivers the shade and functionality your backyard actually needs.