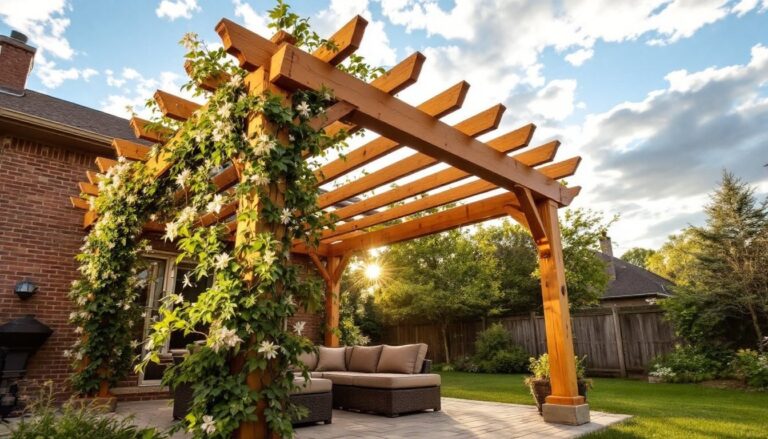
A paver patio with a fire pit anchors your outdoor living space, turning a plain backyard into somewhere people actually want to gather. Whether you’re planning weekend entertaining or quiet evenings with family, the right design balances functionality with visual appeal. This guide walks you through paver patio ideas that work around a fire pit, from layout and material selection to installation strategies that’ll keep everything looking sharp for years. You don’t need a crew of contractors for this one: a solid plan and some sweat equity get you across the finish line.
Table of Contents
ToggleKey Takeaways
- Herringbone and circular paver patio patterns naturally guide the eye toward a central fire pit while providing superior structural integrity and visual engagement.
- Position your fire pit 8–10 feet from the main patio edge with a minimum 10-foot clearance from structures, and place it slightly off-center for better flow and comfort.
- A compacted 4–6 inch gravel base and polymeric sand joints are critical to paver longevity, as 80% of paver failures stem from inadequate base preparation.
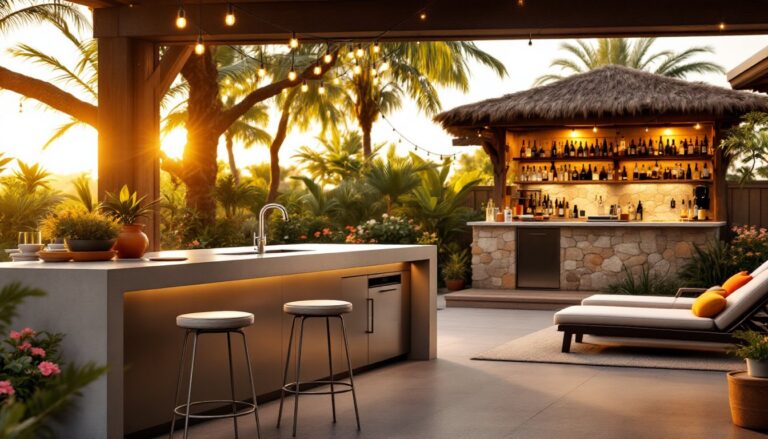
- Choose slip-resistant paver finishes like textured concrete or matte porcelain for fire pit zones, and use darker pavers near the pit to hide soot while lighter tones radiate outward.
- Rent a plate compactor, lay pavers in small sections with frequent level checks, and allow 24 hours for polymeric sand to set before final watering to ensure your patio stays level and level for years.
Modern Paver Designs That Complement Fire Pit Features
Herringbone And Circular Patterns For Fire Pit Areas
The layout you choose sets the tone for the entire patio. Herringbone patterns, where rectangular pavers alternate at 45-degree angles, create visual movement and naturally guide the eye toward a central fire pit. This pattern also provides better structural integrity for traffic zones, as the interlocking angles distribute weight more evenly than running bond or straight patterns.
Circular patterns work beautifully when you want the fire pit as the star. Concentric rings of pavers radiate outward from the pit, making it the obvious focal point. A common approach is to lay pavers in full circles for the first two or three rings closest to the fire pit structure, then transition to herringbone or another pattern for the remaining patio area. This prevents awkward cuts and keeps installation cleaner.
If you want something between those two, try a mixed pattern approach: herringbone in the main entertaining zone and a simple running bond (straight rows) in transition areas. Lighter-colored pavers around the fire pit and darker tones farther out create depth without looking gimmicky. Research from outdoor living design shows that high-contrast patterns draw more engagement to gathering spaces, so don’t shy away from color interplay.
Keep pattern complexity realistic for your skill level. A 12×16-foot patio in pure herringbone takes more cuts and fitting than a simple alternating pattern. If you’re new to paver work, stick with running bond in the main area and save the herringbone for a smaller feature zone around the fire pit itself.
Layout And Space Planning For Safety And Aesthetics
Fire Pit Placement And Clearance Requirements
Before a single paver goes down, nail your fire pit location. The National Fire Protection Association (NFPA) 211 standard requires a minimum of 10 feet clearance from structures like fences, walls, or overhanging branches. If you’re in a jurisdiction with stricter codes, local fire marshals often recommend 15 feet for comfort and liability peace of mind. Check your local IRC (International Residential Code) since requirements vary by region.
Position your fire pit slightly off-center from the patio seating area rather than dead middle. Off-center placement feels more intentional and leaves room for circulation, people need a path around the pit without stepping over seats. Aim for the pit to sit about 8–10 feet from the main patio edge where you’ll place seating. This distance keeps guests comfortable: closer than that, and radiant heat becomes uncomfortable: farther, and conversation gets tough.
Slope and drainage matter more than they sound. The patio should slope gently away from the fire pit and any structures, roughly 1/8 inch of drop per linear foot is the standard. This prevents water pooling, which ruins pavers and causes frost heave in cold climates. If your yard slopes naturally, work with it rather than fighting it.
Consider prevailing winds. Smoke behavior varies with direction, so position seating where wind typically blows smoke away. Check seasonal wind patterns for your area, a summer breeze comes from a different direction than winter wind in most regions. Southern Living’s outdoor guides emphasize this planning detail, and it makes a real difference in how usable your space becomes.
Material Selection For Durability And Style
Choosing The Right Paver Types And Finishes
Paver material options break down into a few categories, each with trade-offs. Concrete pavers are the workhorse, affordable, available in hundreds of colors and finishes, and durable in most climates. Standard dimensions run 6×9, 8×8, or 12×12 inches (nominal sizes: actual dimensions run a bit smaller). Concrete handles freeze-thaw cycles reasonably well if you choose a quality mix, though cheaper pavers degrade faster in harsh winters.
Natural stone, slate, limestone, or bluestone, offers real character but demands more maintenance. Limestone and bluestone are easier to work with than slate because they’re less brittle, but all stone is heavier and more expensive. Stone also develops a weathered patina over time, which some love and others find dingy. Seal natural stone every 2–3 years if you’re in a wet climate: skip it in arid regions.
Porcelain pavers are newer to the residential market and perform exceptionally well in extreme climates. They’re non-porous, so they don’t absorb water or stain easily. Cost runs higher than concrete, but if you live where freeze-thaw or heavy moisture is brutal, porcelain justifies itself.
For a fire pit zone, stay away from glossy or polished finishes, these get slippery when wet. Choose a slip-resistant finish: textured concrete, natural cleft stone, or matte porcelain. Around the fire pit itself, darker pavers hide soot better than light colors: this matters for long-term aesthetics. A ring of dark pavers immediately around the pit and lighter tones radiating outward gives visual continuity while being practical.
Base material is just as critical as the paver itself. Use a 4–6 inch compacted gravel base (crushed stone, not fill dirt) and a 1 inch layer of polymeric sand for joints. Polymeric sand hardens when moistened and keeps weeds out better than regular sand. The Spruce’s paver installation guide highlights that 80% of paver failure comes from inadequate base prep, so don’t cheap out here.
DIY Installation Tips For Long-Lasting Results
Preparation is where most DIY projects succeed or fail. Start by marking the patio boundaries with landscape paint or string lines. Rent a plate compactor (vibrating compaction tool), this isn’t optional if you want pavers that stay level. A hand tamper works for small patios under 100 square feet, but a rented compactor saves your back and gives better results.
Excavate the area to a depth that accounts for base material, sand layer, and the paver itself. Most pavers run 2–3 inches thick. Add 4–6 inches for compacted gravel base and 1 inch for sand, then subtract your paver thickness from desired final grade. If your math shows you need 10 inches of depth total, excavate 12 inches to account for settling. Compact the gravel base in 2-inch lifts, running the compactor over each layer.
When laying pavers, work in 3–4 foot sections at a time. Use a long level and straightedge to check both direction and slope constantly, don’t wait until you’ve laid 20 pavers. Tapping pavers down with a mallet and rubber block keeps them from cracking. For the fire pit surround, mark out your pit footprint with chalk and measure twice before cutting any pavers.
Cutting pavers is loud and dusty. Wear safety glasses, a dust mask, and ear protection, a wet saw with a masonry blade is louder than it sounds. A wet masonry saw produces cleaner cuts than a circular saw and reduces dust, though a circular saw with a masonry blade works for rough cuts. Rent equipment rather than buy if this is your first time.
Joint work is the final push. Spread polymeric sand across the pavers, work it into joints with a broom, then lightly mist with water. Don’t oversaturate on the first pass: let it sit for 24 hours and check for settling before final watering. This slow approach prevents sand from washing out and keeps joints tight.