Planning an outdoor kitchen means thinking beyond just dropping a grill in the backyard. The layout sets everything else in motion, where you’ll prep food, where guests will gather, how heat and smoke will behave, and whether you’ll actually cook there comfortably or abandon the space after Labor Day. A good outdoor kitchen layout matches your cooking style, yard dimensions, weather patterns, and budget. Whether you’re working with a sprawling lot or a modest patio, the right design keeps workflow tight, food prep efficient, and entertaining smooth. This guide walks you through proven layouts and the practical thinking behind each one.
Table of Contents
ToggleKey Takeaways
- Outdoor kitchen layout fundamentals—placement away from wind, proper workflow with 3–5 foot spacing between prep, grill, and service zones, and weather-resistant materials—determine long-term usability and comfort.
- L-shaped outdoor kitchen layouts work best for most suburban yards by naturally separating prep and cooking areas while fitting into corner spaces.
- Galley-style kitchens maximize efficiency in tight spaces with parallel counters and compact storage, ideal for serious home cooks prioritizing organization over entertaining.
- Island-centered outdoor kitchens create social gathering hubs but require at least 4 feet of clearance on all sides, buried utilities, and patios over 200 square feet to function effectively.
- Stainless steel appliances and cabinetry resist rust and weather better than alternatives, making them worth the upfront investment despite higher initial costs.
- Sketch your layout to scale, test your cooking workflow mentally, and choose permeable paving and proper drainage to prevent water pooling and maintain the outdoor kitchen long-term.
Understanding the Basics of Outdoor Kitchen Design
Before committing to a layout, nail down three fundamentals: placement, workflow, and protection.
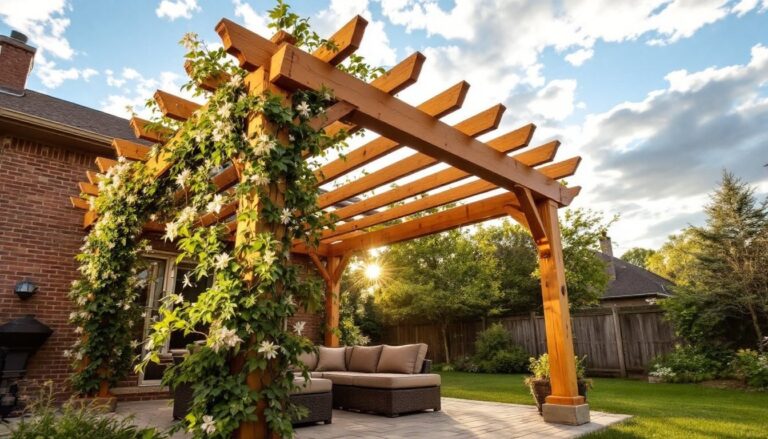
Placement and Exposure. Orient your kitchen away from prevailing winds when possible, this keeps smoke from drifting into the house and eating areas. Check sun patterns: a pergola or shade structure over the prep zone prevents afternoon burnout. If your yard slopes, place the cooking area on level ground or plan for a retaining wall. Wind, sun, and terrain aren’t adjustable after you’re done building, so get these right upfront.
Workflow Essentials. The classic kitchen triangle (fridge, sink, stove) applies outdoors too. A typical prep-to-cook-to-serve flow looks like this: storage or fridge, prep counter, grill, plating and serving station. Ideally, these sit within about 3 to 5 feet of each other. Cramped spacing turns cooking into shuffling: too spread out and you’re exhausted before the steaks are on.
Weather and Durability. Outdoor gear faces rain, UV, temperature swings, and frost heave. Choose stainless steel or powder-coated cabinets, permeable paving (gravel, pavers, or proper drainage) to avoid pooling water, and a roof or pergola overhead. Built-in components need proper ventilation and clearance from combustibles, typically 10 inches minimum to wood framing per code, though always check your local building department first.
The Classic L-Shaped Layout
An L-shape is the workhorse of outdoor kitchens. One counter arm holds the grill and cooking gear: the other houses prep space, storage, and a sink. This layout flows naturally and fits well into corner spaces where two walls or fences meet.
Why It Works. The L-shape lets you prep on one side, cook on the other, and serve from either. Guests can cluster around one arm without blocking workflow. It’s also forgiving for odd-shaped yards, you’re using existing boundaries instead of fighting them.
Typical Dimensions. Plan for a 3-foot grill along one arm, a 2- to 3-foot prep counter on the other, and at least 2 feet of width for cabinets underneath. The inside corner creates a natural gathering spot. Total footprint is usually 8 to 12 feet per side, modest enough for most suburban lots.
What to Watch. The inside corner can become a dead zone where items get shoved and forgotten. Install an organizer or lazy Susan cabinet there to maximize the space. Also, if your yard gets afternoon sun, put the prep counter on the shaded side: cook-side doesn’t need as much shade since heat is less of an issue when you’re actively grilling.
The Galley-Style Kitchen Setup
A galley mirrors a narrow ship’s kitchen, two parallel counter runs facing each other across 3 to 4 feet of walking space. This works beautifully along a fence or deck edge, especially if yard width is limited.
Efficiency in Tight Spaces. Galley layouts are compact and efficient. One counter holds the grill and cooking essentials: the opposite side handles prep, storage, and cleanup. Everything is within arm’s reach, making it ideal for serious home cooks who value speed and organization. You’re not taking steps: you’re pivoting.
Traffic Flow. The trade-off is foot traffic. A galley becomes a choke point if guests wander through. Reserve it for kitchens set slightly apart from the main seating area, or use a small herb garden or planter boxes as a subtle barrier to direct people around rather than through.
Material Specifics. In a galley, every inch matters. Opt for space-saving features: a compact under-counter fridge, shallow cabinets, and wall-mounted or hanging tool storage. A 30-inch counter on each side with a 36-inch walkway is a realistic footprint. Keep the grill and prep zone clearly defined so one doesn’t accidentally encroach on the other.
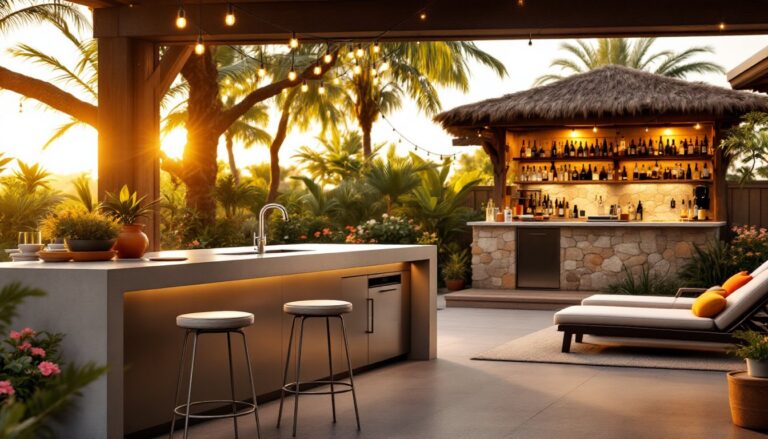
Island-Centered Outdoor Kitchens
An island sits as a freestanding anchor in the middle of a patio or deck. It’s the show-off layout, best suited to large, open yards and entertaining-focused homeowners.
Statement Piece Appeal. Islands naturally draw people in. A properly sized island with seating on one side and cooking on the other becomes a social hub. Guests can grab drinks and snacks while you grill, creating that coveted “cooking with the crowd” atmosphere. Islands also work well when you want the grill as a visual centerpiece rather than tucked into a corner.
Space Requirements. Islands demand breathing room. Plan for at least 4 feet of clearance on all sides for safety and foot traffic. A practical island is 3 feet wide by 5 to 6 feet long, large enough for a built-in grill, side burner, storage, and a seating bar on the back. Smaller yards often can’t accommodate this comfortably. If your patio is under 200 square feet, an island eats too much of the entertaining space.
Ventilation and Utilities. Islands require buried gas lines, electrical runs, and drainage for sinks. This adds cost and complexity. You’ll also need proper ventilation overhead, either a built-in hood or a ceiling-mounted vent system if you’re under a pergola. Factor these into your budget before committing. Islands also require a solid foundation and proper grading around them to prevent water pooling.
Optimizing Space and Workflow
No matter which layout you choose, workflow optimization separates a usable kitchen from an abandoned one.
Measure Twice, Build Once. Before ordering cabinets, run through a full cooking scenario. Where do you store tongs, dishes, and raw meat? How many prep stations do you need when cooking for 12 people? Draw your layout to scale on graph paper and test it mentally. Walk the sightlines, can you see your food while working? Can guests see you without standing in the smoke?
Counter Heights and Depths. Standard outdoor counters are 36 inches tall, same as indoor kitchens. Depths are typically 24 to 30 inches. Grill islands are sometimes slightly higher (38-40 inches) to reduce bending. These aren’t arbitrary, they’re based on ergonomics and years of kitchen design. Stick with them unless you have a specific reason not to.
Storage and Accessibility. Outdoor kitchens live in the elements. Anything stored outside needs weatherproof cabinets with good drainage holes or gaskets. A 4-foot run of cabinetry under your counter gives you space for a grill, mini fridge, propane storage (if applicable), and cooking tools. Keep frequently used items at waist height: save lower shelves for seasonal or backup gear. Upper shelves or wall-mounted racks work for herbs, oil, and spice racks if they’re protected from rain.
Budgeting and Material Selection for Your Layout
Layout choices directly impact cost. An L-shape in modest materials (stainless steel grill, simple cabinetry, pavers) runs $3,000 to $8,000 depending on your region and finishes. Islands and fully outfitted galleys push $10,000 to $25,000 or more. But those numbers mean nothing without understanding what you’re actually paying for.
Appliances and Built-Ins. A quality 36-inch gas grill ranges from $1,200 to $3,500. Add a side burner ($400–$800), a mini fridge ($500–$1,500), and a sink module ($400–$1,000), and appliances alone eat $3,500 to $6,000. Don’t cheap out here, outdoor equipment endures, and a failing grill after two years is expensive regret. Stainless steel is the industry standard because it resists rust and weathers better than painted steel.
Cabinetry and Countertops. Powder-coated steel cabinets cost less upfront but require occasional touch-ups. Stainless steel cabinets cost 50% more but need less maintenance. Countertops matter too: granite or engineered stone run $50–$100 per linear foot: concrete is cheaper ($30–$50 per foot) but cracks over time without proper sealing. Tile offers a middle ground and regional character. When budgeting, factor in installation, which often doubles the material cost.
Flooring and Hardscape. Permeable pavers prevent standing water: poured concrete is budget-friendly but cracks in freeze-thaw cycles. Gravel is the cheapest option but requires raking and weeding. Plan for 3–4 inches of base preparation under any surface. A 12-by-16-foot patio with quality pavers runs $2,000 to $4,000 installed, not negotiable if you want it to last.
Conclusion
Your outdoor kitchen layout should match how you actually cook and entertain, not Pinterest. An L-shape works for most backyards: galleys maximize tight spots: islands suit entertaining-first households. Measure your yard, sketch your workflow, and pick materials that handle weather without constant replacement. Start with a solid foundation, proper drainage, and weatherproof gear, those choices outlast trends and gadgets.